Creating BOMs
A bill of materials (BOM) defines what goes into a product — which components, how much of each, and any additional costs. This guide walks you through creating your first BOM.
Prerequisites
- At least one finished good or sub-assembly product (the thing you're building)
- At least one raw material, component, or sub-assembly product (the things that go into it)
If you haven't created products yet, see the Quickstart or Importing Products.
Steps
1. Start a new BOM
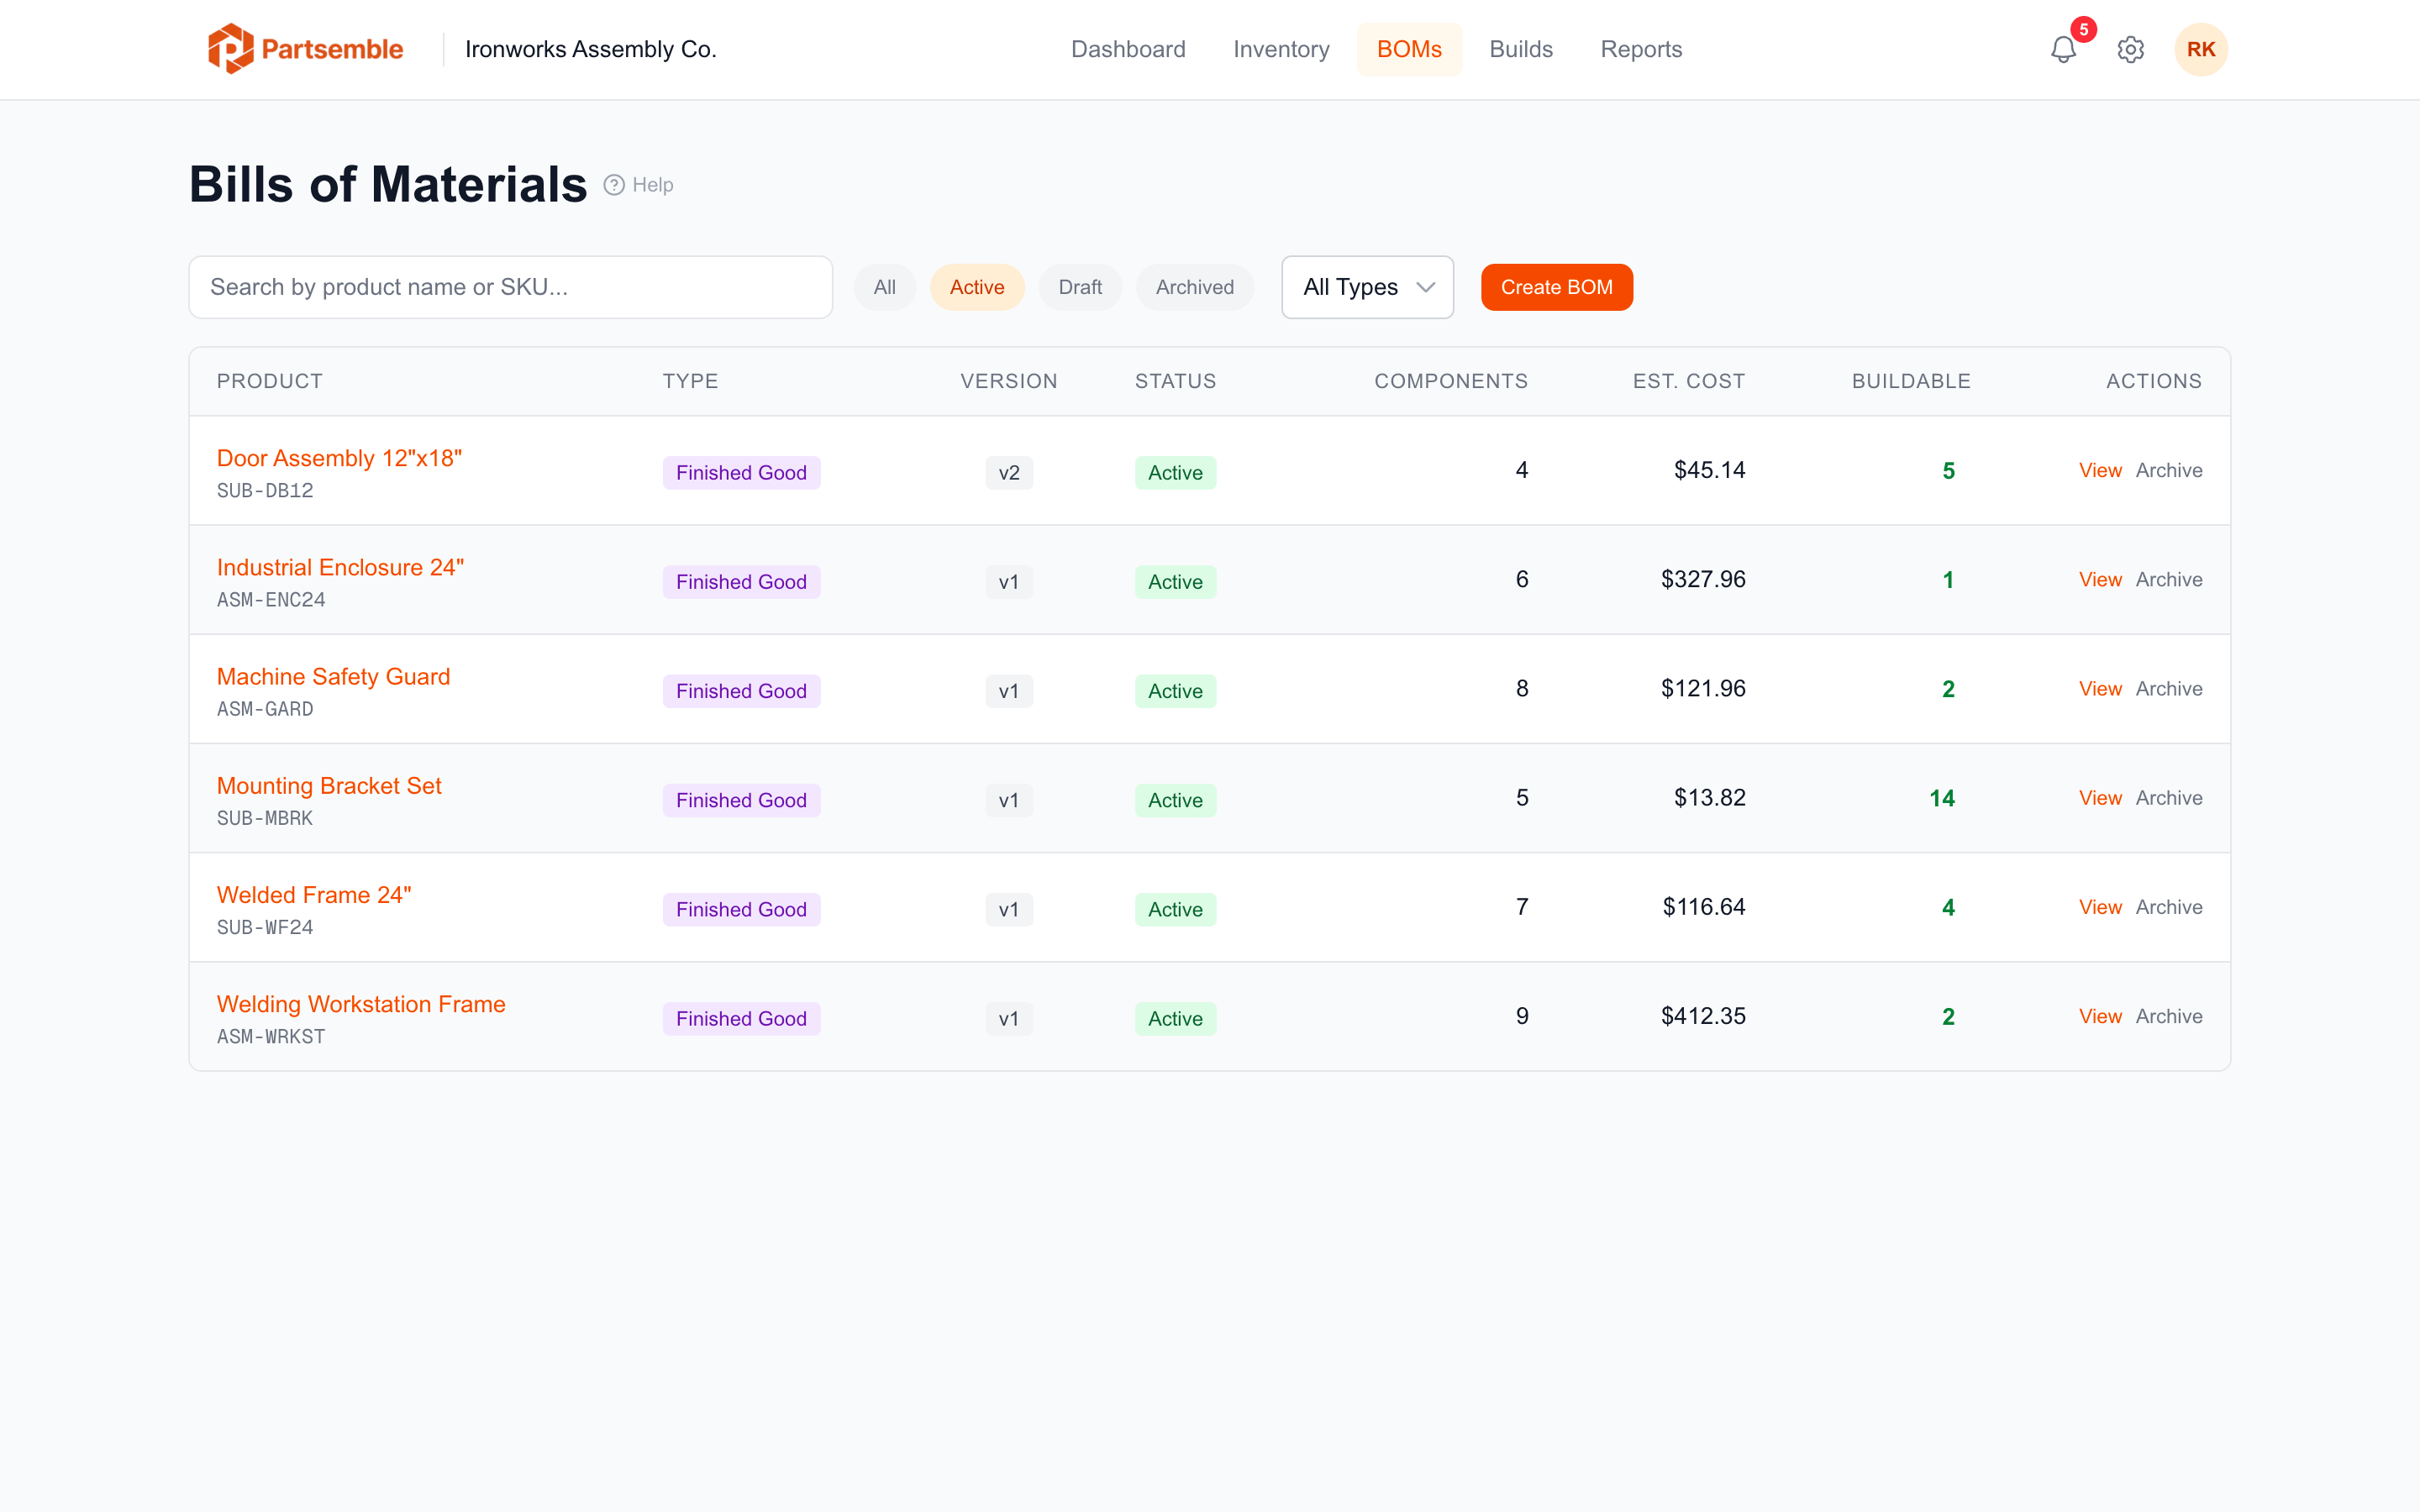
Navigate to BOMs in the left sidebar and click New BOM.
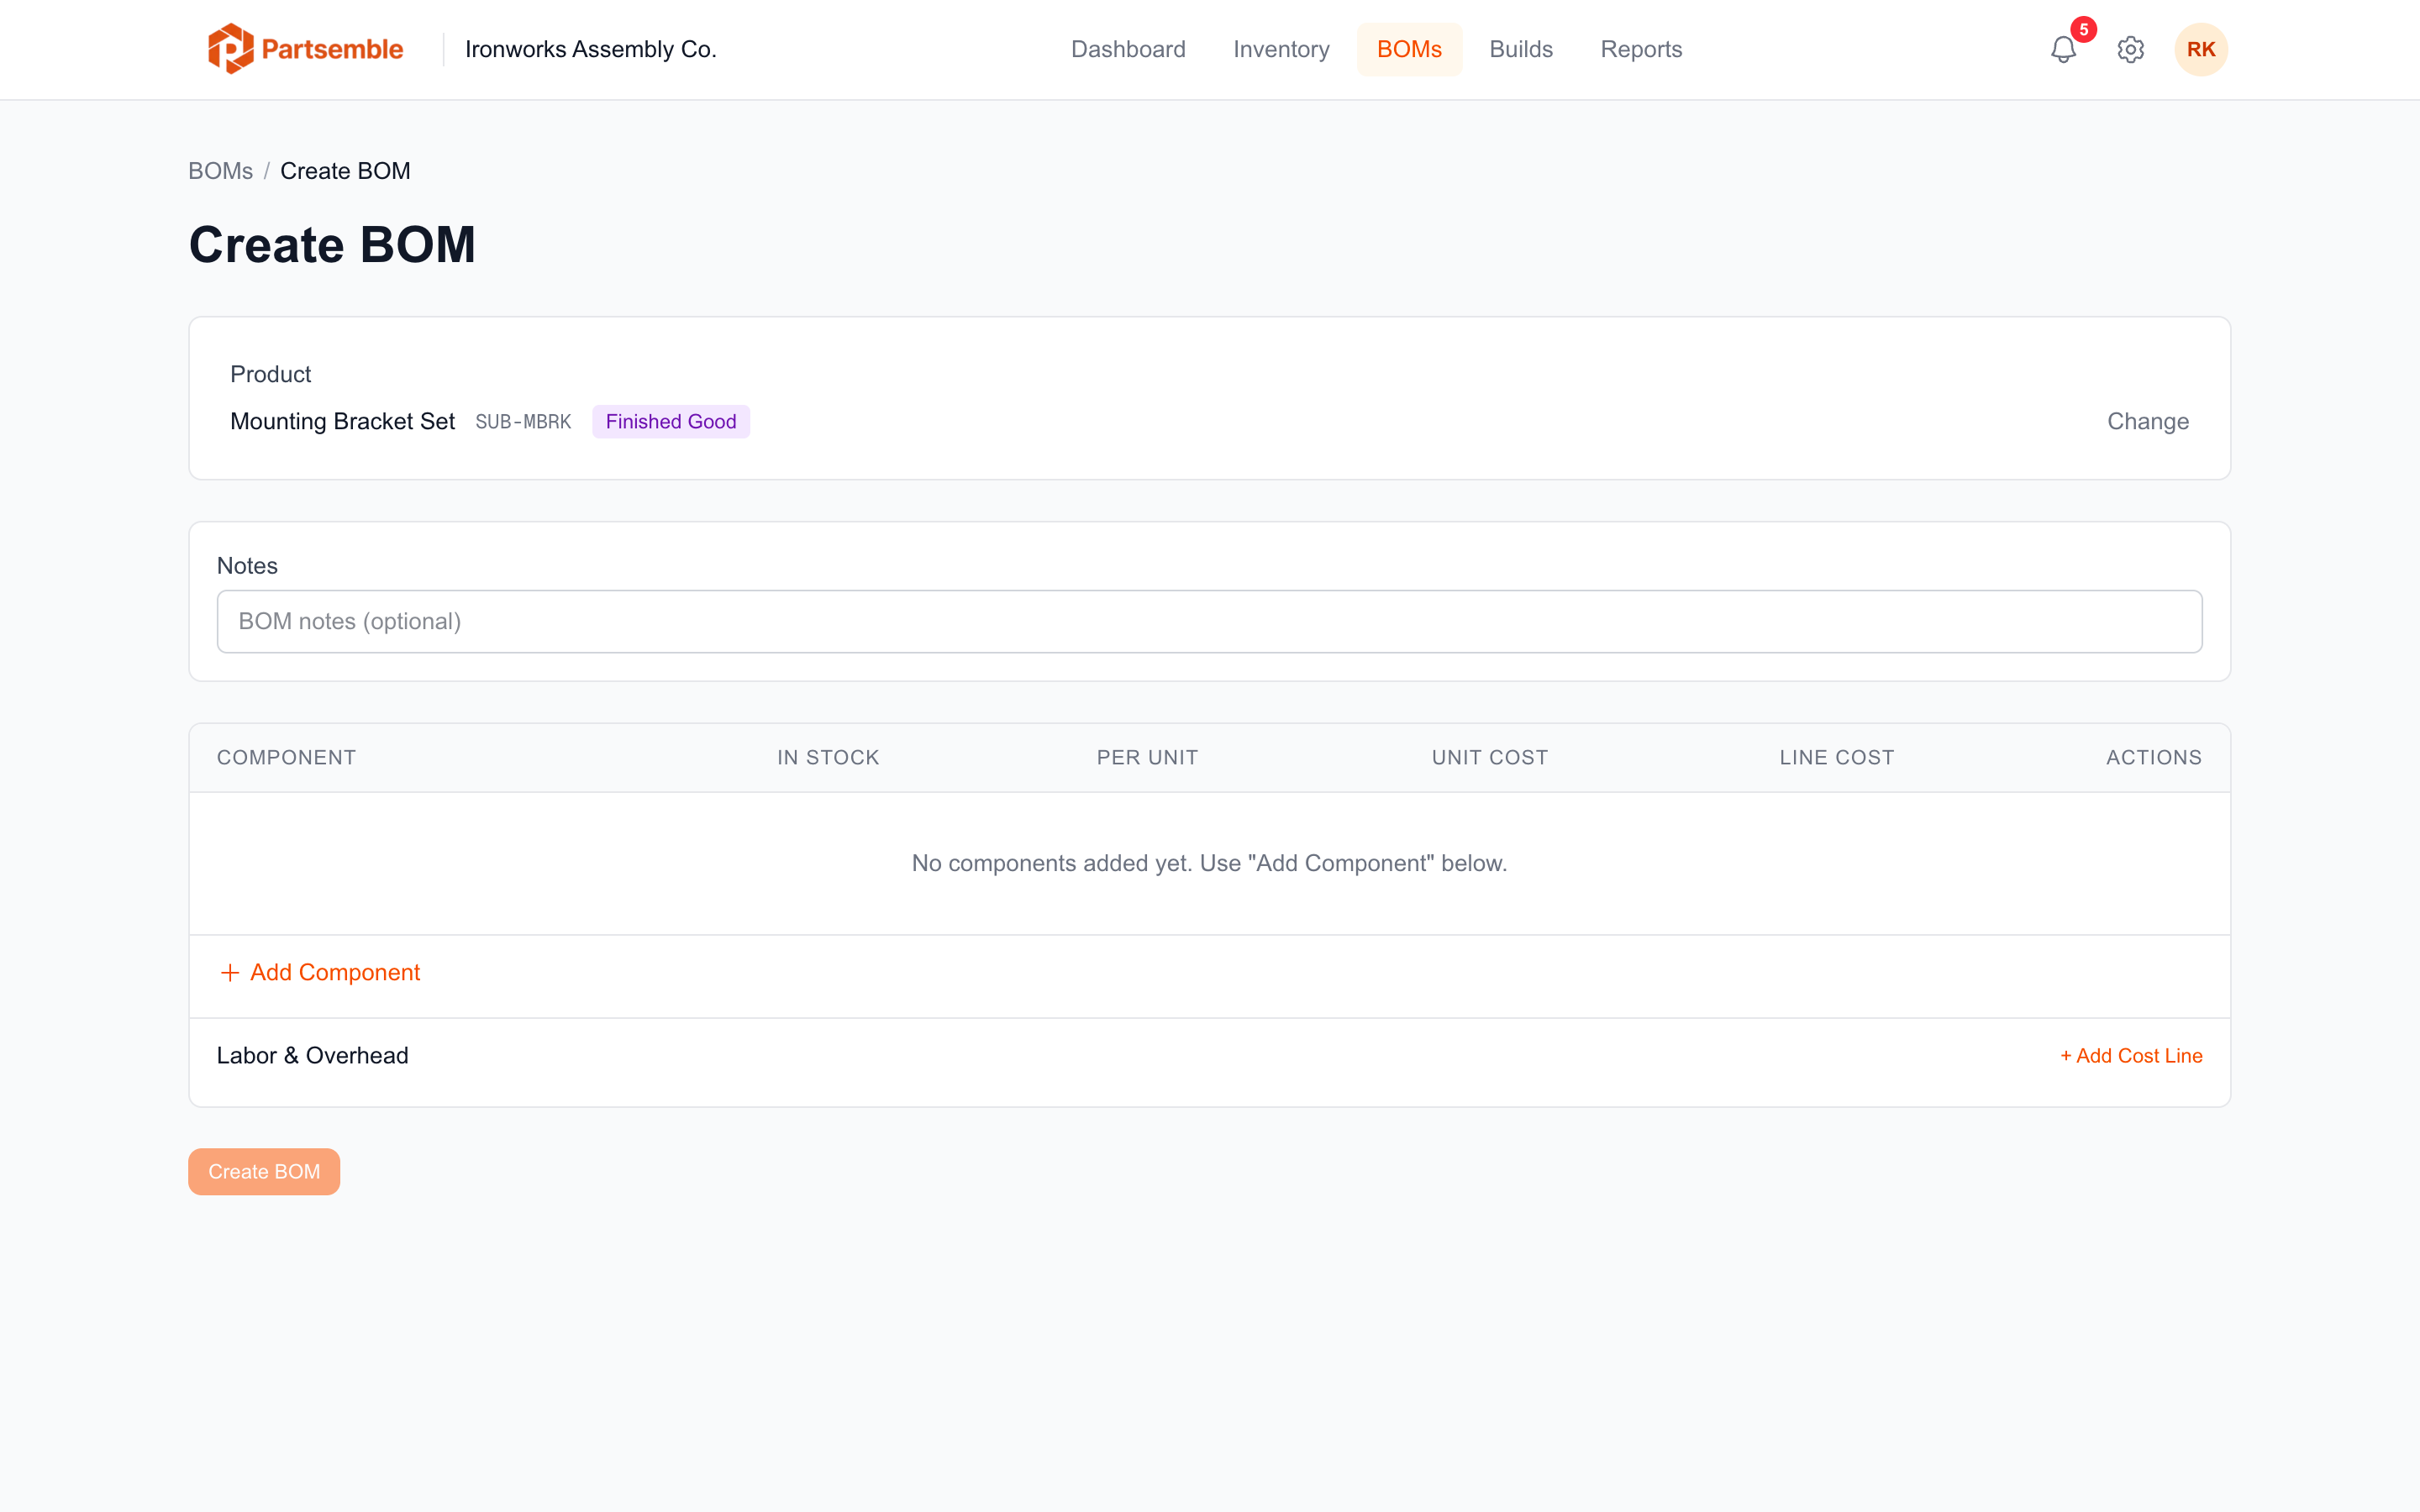
2. Select the product
Choose the product this BOM is for. The dropdown shows your finished goods and sub-assemblies. Each product can have one active BOM at a time — if the product already has an active BOM, you'll create a new version instead (see Versioning).
3. Add components
Click Add Component to open the component picker. Search for a product by name or SKU, select it, and set the quantity needed per unit built.
For example, if your shelf bracket requires 2 steel plates and 4 hex bolts, add two entries:
| Component | Quantity |
|---|---|
| 14-Gauge Steel Sheet | 2 |
| Hex Bolt 3/8" | 4 |
Repeat for all components. The order you add them determines their display position, which you can adjust later.
A component cannot reference the product itself (no self-references), and Partsemble checks for circular references at any depth. If product A uses B, and B uses C, then C cannot use A.
4. Mark optional components (if any)
If a component is sometimes included but shouldn't prevent a build when it's out of stock, toggle the Optional flag on that entry. See Optional Components for details on how this affects buildability and cost calculations.
5. Add cost lines (if any)
Cost lines capture non-material costs like labor, overhead, or testing. Click Add Cost Line and fill in the details. See Cost Lines for a full explanation.
6. Add notes (optional)
Use the notes field for internal documentation — batch instructions, quality notes, or process details. Notes are visible to anyone who views the BOM but don't affect any calculations.
7. Save
Click Save. The BOM is created in Active status and is immediately available for building.
What You'll See
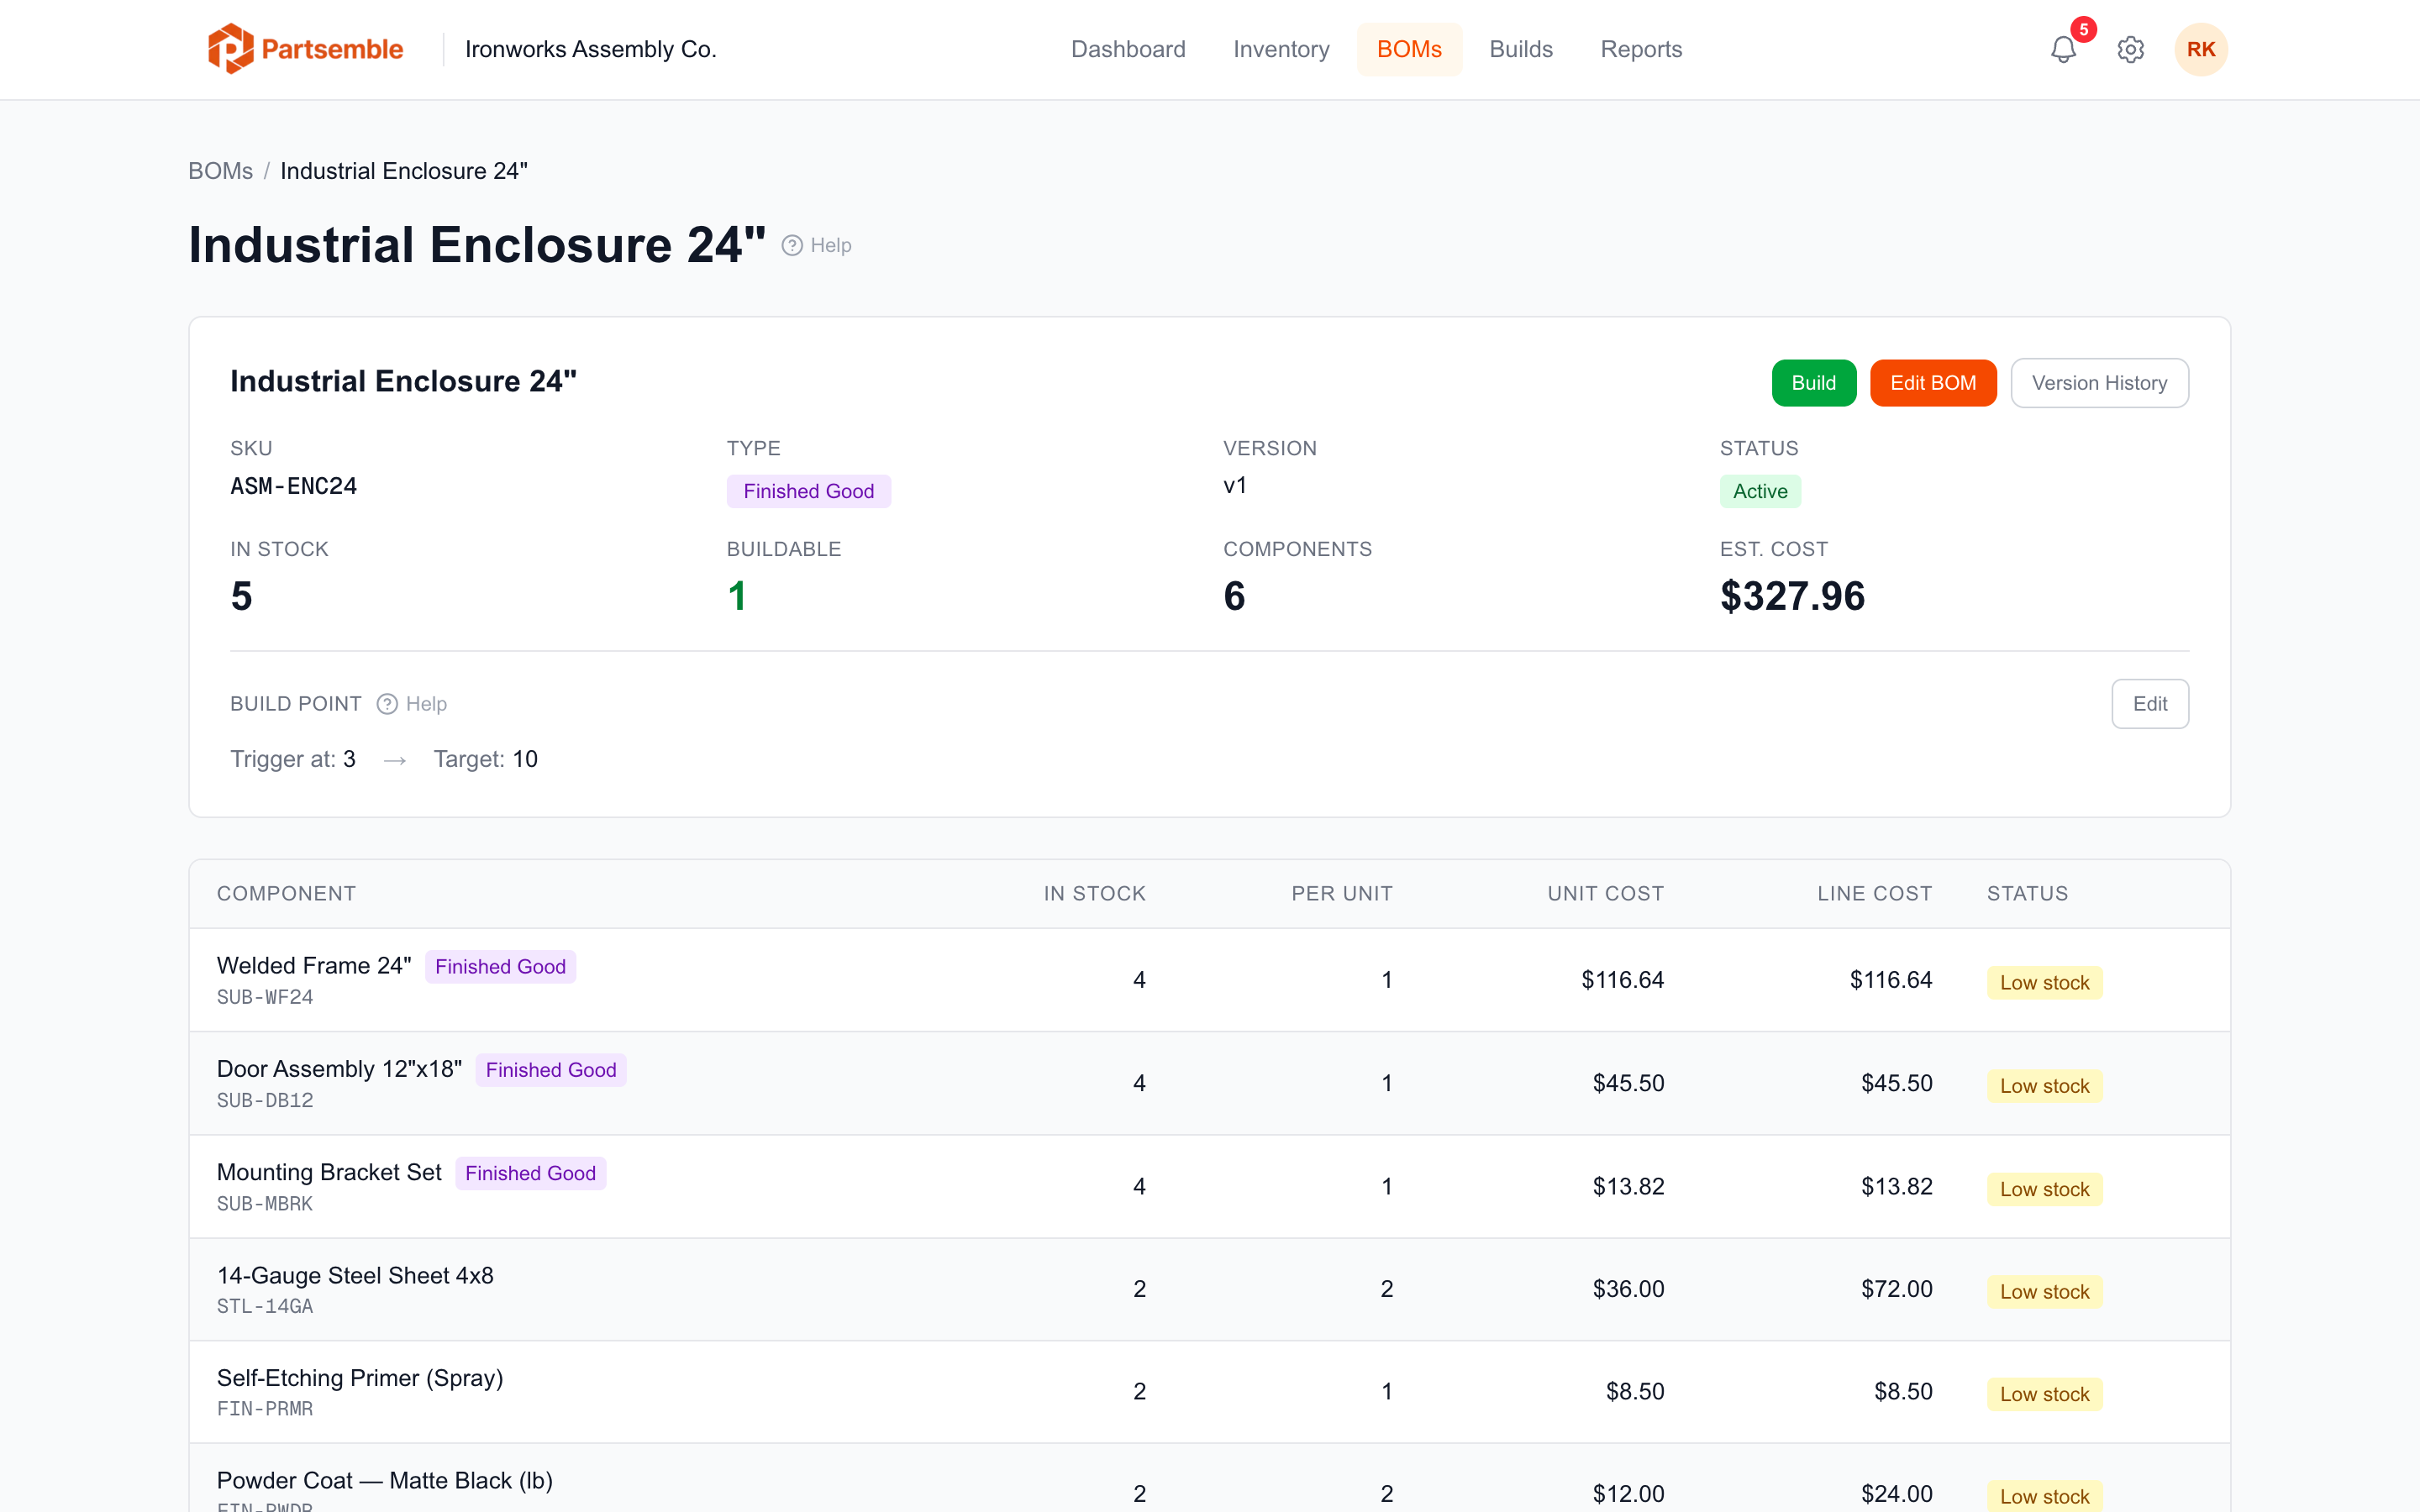
After saving, the BOM detail page shows:
- Estimated cost per unit — the sum of all component costs (at current weighted average prices) plus all cost lines
- Max buildable — the maximum number of units you can build given current component stock (the bottleneck component determines this number)
- Component list — each entry with name, SKU, quantity, unit cost, line cost, and current stock
- Cost lines — each non-material cost with type, label, and amount per unit
What Happens Next
With an active BOM in place, you can execute a build for this product. Navigate to Builds and click Quick Build to run one immediately, or create a Planned Build to schedule it for later.
You can also set a build point on the BOM so Partsemble automatically suggests builds when stock gets low.